
Selecting a hot stamping machine for packaging requires more than matching a machine to the outside length and width of a paper box. The real specification depends on what the die must contact, how the product is supported, how the complete setup enters the working space, and whether pressure can be distributed across the pattern.
This guide focuses on specification sizing after the product family and process direction are already understood. If the project is still at an earlier stage, start with how to choose the right hot stamping machine for packaging products and then compare manual, pneumatic, hydraulic, and automatic hot stamping machines.
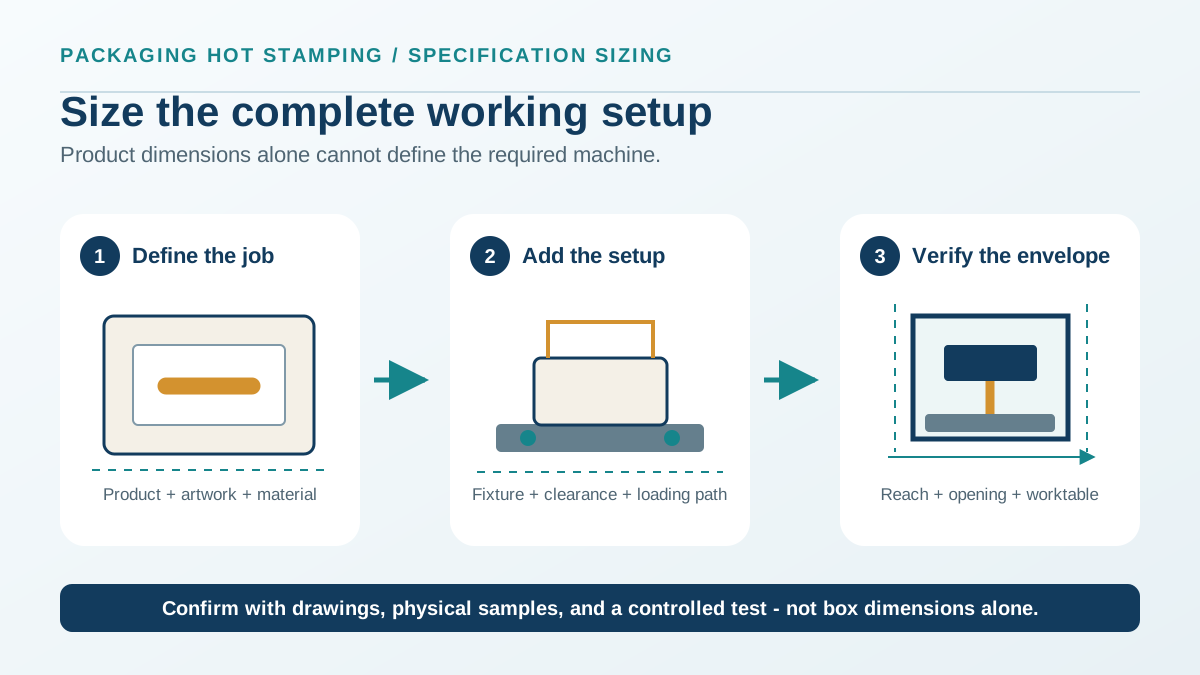
Product Size Is Not the Effective Stamping Area
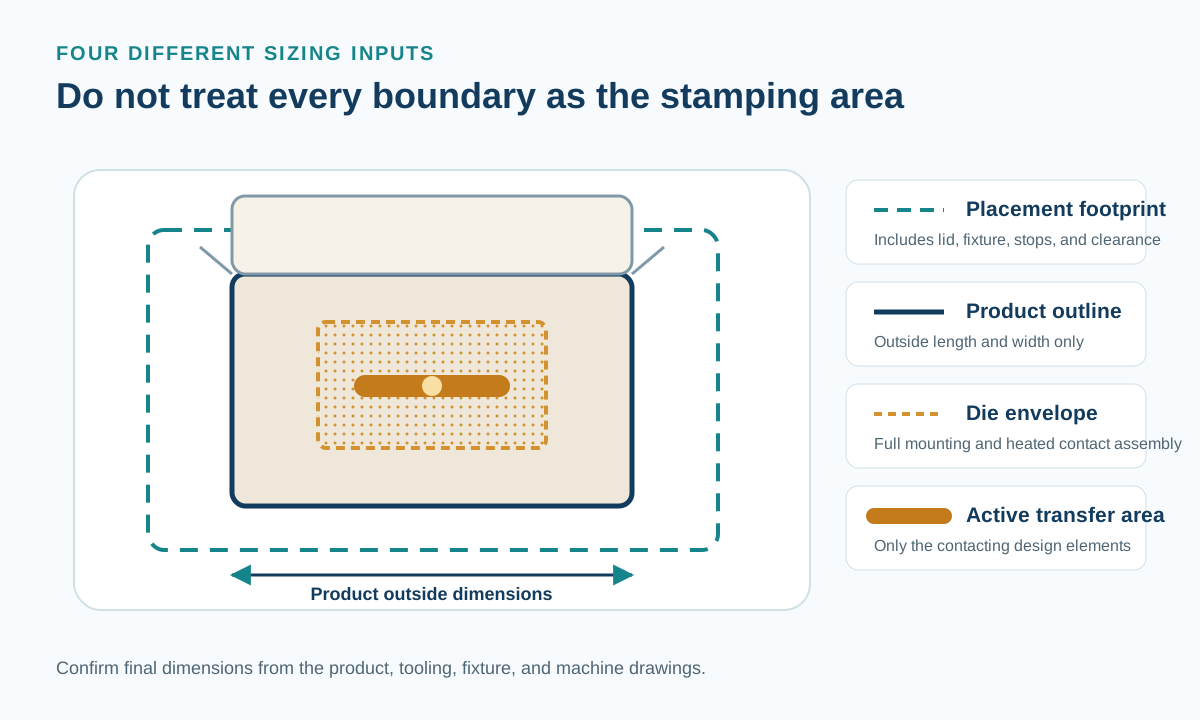
Several dimensions are often combined into one number during an inquiry, but they control different parts of machine selection:
- Product outside dimensions: the overall length, width, and height of the packaging product.
- Placement footprint: the space occupied on the table by the product, open lid, flange, support, stops, clamps, and handling clearance.
- Die or die-holder envelope: the complete mounting area required beneath the heated plate, not only the visible artwork.
- Artwork envelope: the outer boundary of all design elements, including separated logos, text, borders, or emblems.
- Active transfer area: the parts of the die that actually contact the foil and substrate.
A small logo on a large rigid box does not automatically require a press sized for the full box surface. Conversely, a compact box may require a larger table or opening because the fixture, lid, or loading direction extends beyond the product outline.
For artwork with separated elements, send both the overall artwork envelope and the active contact regions. That distinction helps the supplier review mounting space, pressure distribution, and whether the whole pattern can be reached within the effective stamping zone.
Pattern Structure Changes the Press Requirement
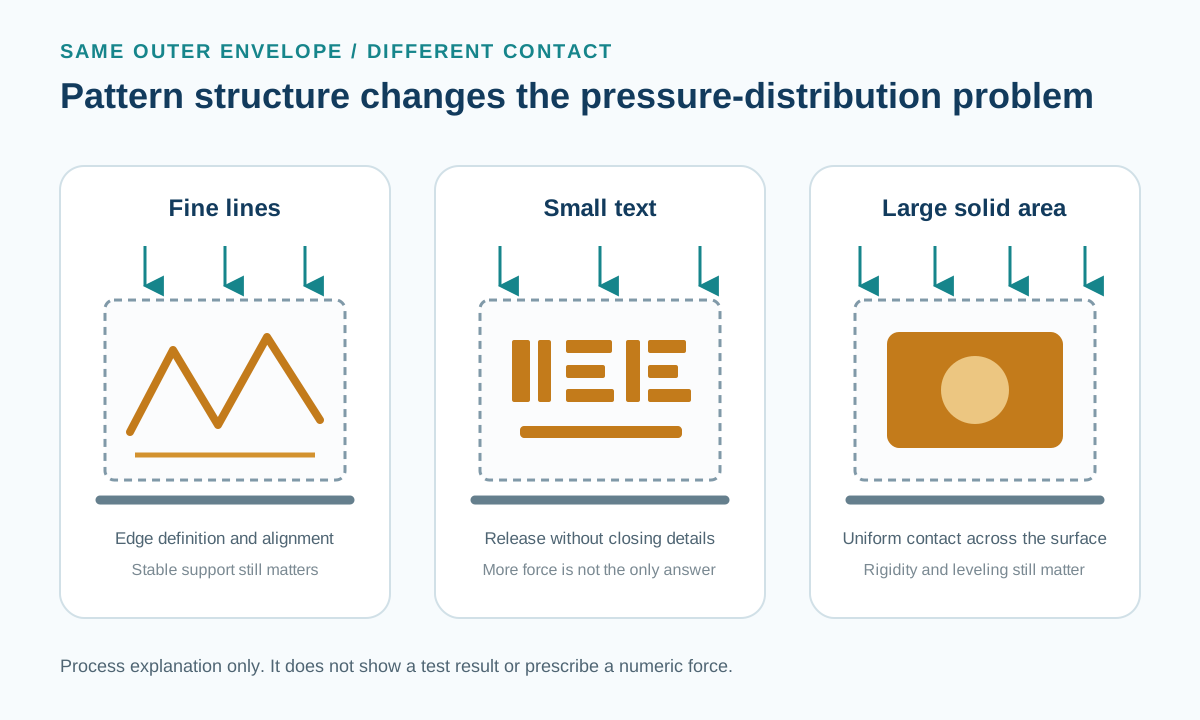
Press capacity cannot be selected from artwork width multiplied by height alone. Two designs with the same outside envelope may load the machine differently.
Fine lines and small text need controlled registration, flat die contact, stable support, and enough pressure for clean foil release without closing fine details. Extra force does not correct a misaligned die, unsuitable foil, weak fixture support, or incorrect temperature and dwell time.
Large solid areas require uniform contact across more of the surface. Platen rigidity, die leveling, substrate flatness, fixture support, and consistent heating become important. A machine may have sufficient nominal force but still produce weak edges or uneven coverage if pressure is not distributed evenly.
Mixed patterns combine both demands. A solid emblem needs complete contact while nearby fine lettering needs clean edges. Treat supplier calculations as a starting point, then confirm the proposed machine, foil, die, fixture, substrate, and settings through controlled packaging hot stamping sample tests.
The Worktable Must Fit the Fixture and the Handling Process
A worktable is not adequately sized just because the product can sit on it. The complete setup may include:
- a fixture, jig, nest, or internal support;
- side stops, locating blocks, clamps, or vacuum components;
- clearance for operator loading or an automatic handling mechanism;
- an open lid, sidewall, flange, handle, or projecting section;
- adjustment space for registration and repeat positioning;
- a safe entry and removal path.
This is especially important for assembled rigid boxes, wine boxes, and deep gift boxes. Their height and three-dimensional shape can prevent entry beneath the head even when the table length and width appear sufficient. A fixture may also need to support a box from inside or bring a side panel level with the stamping plane.
Show the proposed product orientation and loading direction in the inquiry. A top-down drawing alone may hide the height, throat depth, or open-lid feature that determines whether the setup can be loaded. For shaped or assembled products, review when a custom hot stamping fixture or jig is needed before finalizing the table size.
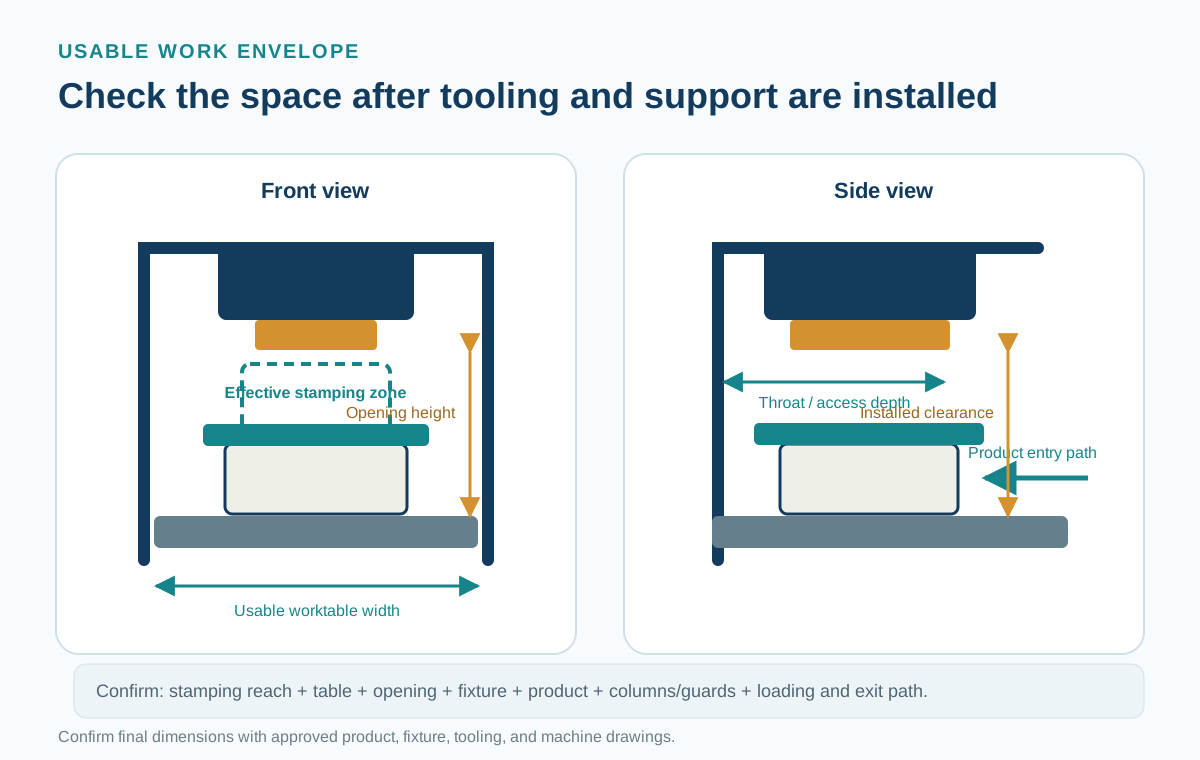
Confirm the Usable Work Envelope, Not the Machine Outline
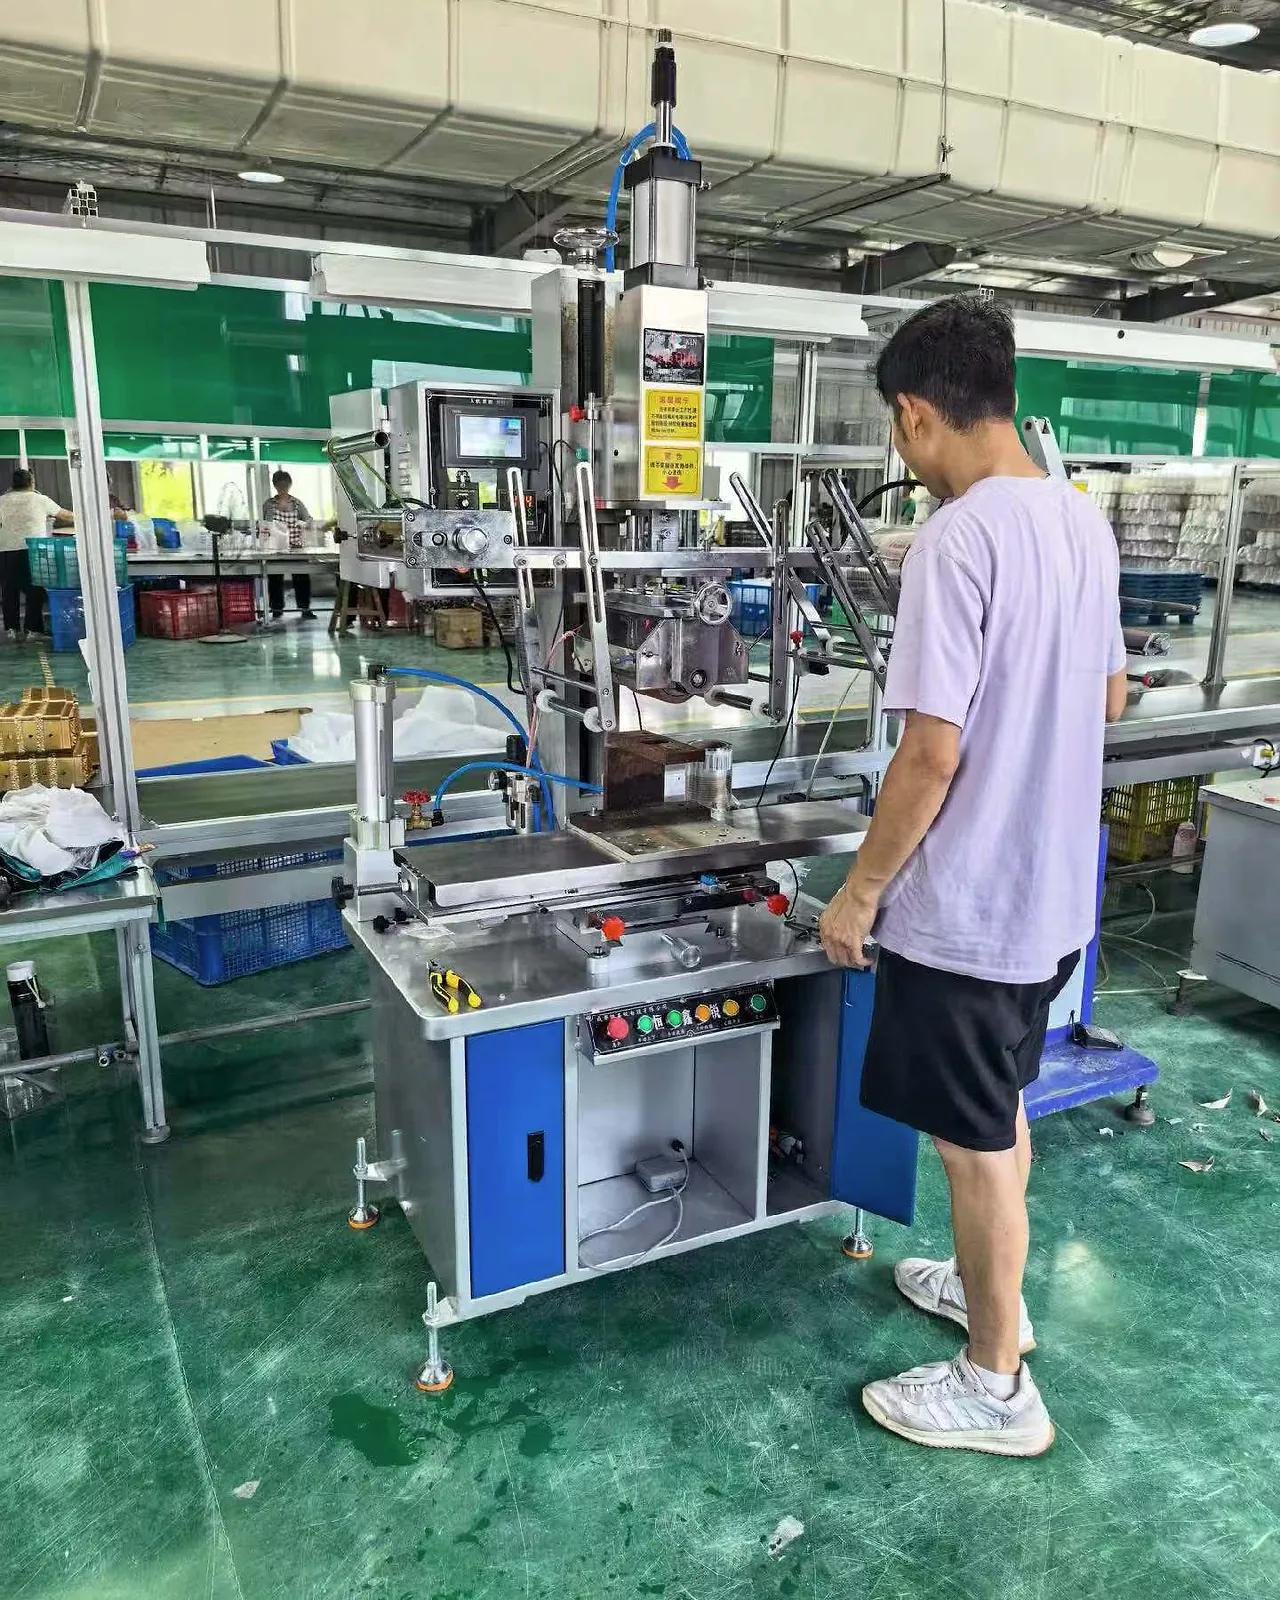
Catalog dimensions describe the external machine footprint. Buyers need a drawing of the usable space around the product and tooling. Check each of these items separately:
- effective stamping zone beneath the head;
- worktable length and width;
- opening height after the die holder, heated plate, fixture, and product are installed;
- usable stroke and adjustment range;
- clearance around columns, guards, foil guides, and heating components;
- throat depth and access from the intended loading side;
- product entry, registration, and exit path.
A table can be larger than the area reached by the stamping head. The quoted opening can also become smaller after tooling and product support are installed. Ask the supplier to mark the effective stamping zone and opening configuration on a machine drawing, then compare it with a drawing of the complete product-and-fixture setup.
For automatic equipment, repeat the same check for infeed, orientation, indexing, discharge, and changeover. A product that fits beneath the head may still be unsuitable for the feeding path or required orientation.
Build a Machine-Sizing Input Sheet
The following worksheet keeps the quotation tied to verifiable inputs rather than assumptions.
| Input | What to provide | What it helps determine |
|---|---|---|
| Product | Outside length, width, height, assembled state, and photos | General access, support, and handling needs |
| Stamping position | Exact location and distance from reference edges | Reach, orientation, fixture reference, and loading direction |
| Artwork and die | Vector artwork or die drawing, overall envelope, fine details, and solid areas | Die mounting, active contact pattern, and pressure-distribution review |
| Complete setup | Product plus fixture, stops, lid projection, and hand or automation clearance | Worktable size, opening height, throat access, and safe movement |
| Material system | Substrate, coating, lamination, texture, and surface condition | Foil and process test plan; it does not set machine size by itself |
| Production method | Batch size, output target, changeover pattern, and loading method | Manual, pneumatic, hydraulic, or automatic configuration direction |
| Evidence | Physical samples, target sample, failed samples, photos, and test criteria | Repeatability check before final specification approval |
When comparing supplier proposals, ask each supplier to state whether the quoted limits are external dimensions, nominal table dimensions, or usable dimensions after the intended tooling is installed. The terms are not interchangeable.
Avoid Both Oversizing and Undersizing
Buying a substantially larger machine for unspecified future work can add equipment cost, floor-space demand, setup burden, and tooling complexity. A larger press does not automatically improve foil adhesion, edge definition, or registration.
Undersizing creates a different set of risks: the die may extend beyond the effective zone, the fixture may not fit, the product may not enter the opening, or the operator may lack practical handling clearance. A marginal setup can also make uniform contact harder to maintain across the pattern.
Define the current product family and realistic near-term variations. Then size the machine around the complete process: usable stamping zone, contact pattern, pressure distribution, worktable, opening, fixture, loading path, and production method.
Dimensions and work envelope are only part of selection. Also compare how flat, cylindrical, and curved product geometry changes the required contact motion, die concept, and fixture structure.
FAQ
Can press capacity be calculated from the logo dimensions?
Logo dimensions are only one input. Required capacity also depends on the active contact area, pattern density, die condition, substrate, foil, fixture support, temperature, dwell time, and pressure distribution. Supplier review and sample testing are needed before confirmation.
Should the worktable be larger than the box?
Usually, the table and access space must accommodate the fixture, positioning components, loading direction, handling clearance, and any open or projecting product sections as well as the box itself.
Does a larger machine guarantee better hot stamping?
No. The result depends on the machine, foil, die, fixture, substrate, temperature, pressure, dwell time, positioning, and operating consistency. Oversizing cannot correct unsuitable materials or an unstable setup.
What should I send for machine selection?
Send product drawings, exact stamping-area dimensions and position, artwork or die files, sample photos, material and surface details, loading orientation, and production requirements. A physical sample is strongly preferred for formed, textured, laminated, or difficult-to-support products.
Send the Complete Job Package for Sizing Review
Send PackFinish your product dimensions, exact stamping area, artwork or die drawing, material details, sample photos, loading direction, and production requirements. PackFinish can then review the required working area, press direction, worktable size, fixture concept, and sample-test plan before a machine specification is proposed. Use the PackFinish inquiry page to start the review.